Wondering how to convert all downloaded WPF files to PDF? If so, you have come to the right place! We have put together a guide so you get a clear picture of the whole process.
Working with files in different formats is a hassle, especially when you need to convert less common formats like WPF (Windows Presentation Foundation) files into PDFs.
When defining user interfaces in Windows applications, WPF files are not meant to be shared or printed. As a result, you have no option but to convert it into a more universally accepted format, such as PDF. This makes accessing, reading, and sharing easier across devices and platforms.
In this guide, we will walk you through the process of converting downloaded WPF files into PDF format. So, if you are ready, let’s dive in!
How To Convert All Downloaded WPF Files To PDF?
To learn how to convert all downloaded WPF files to PDF, you must first understand why it is necessary. Converting WPF files to PDF is a great solution and offers many benefits. This is especially true for professionals who often work with WPF files.
WPF files define the layout and user interface of Windows applications. This means they are less accessible for everyday sharing or viewing. On the other hand, PDFs are a universal format and are compatible with a wide range of devices and operating systems.
By converting WPF files to PDFs, you can easily open, read, and share the files without needing any extra software. Additionally, PDFs preserve the original formatting and structure of the content, so you need not worry about anyone changing it.
WPF files often contain intricate designs and layouts, usually unclear in other formats. But if converted into PDF, these elements remain intact, keeping the file’s integrity intact. Also, PDFs are highly versatile and secure. They allow you to add password protection, watermarks, or electronic signatures to protect your data.
Generate PDF Files In WPF
With Syncfusion® .NET PDF library, you can easily create, edit, and read PDF documents. Additionally, it supports advanced operations like managing forms, merging, stamping, splitting, and securing PDF files.
Refer to the Assemblies Required or NuGet Package Required documentation to integrate the .NET PDF library into your WPF application.
Here are the steps to generate a PDF document in WPF:
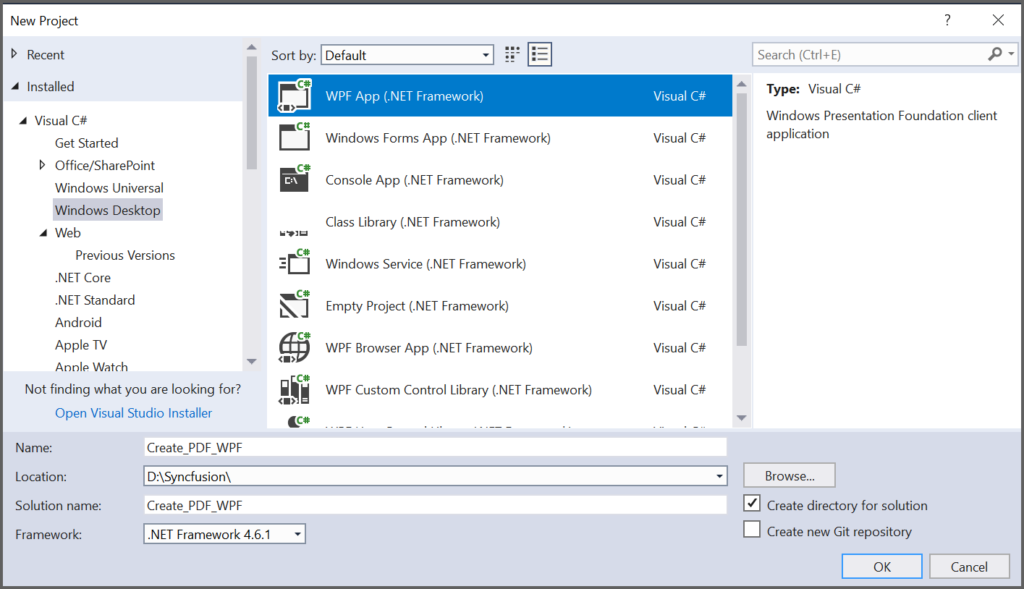
- Start by creating a new WPF application project.
- Add the Syncfusion.Pdf.Wpf NuGet package to your .NET Framework application by downloading it from NuGet.org.
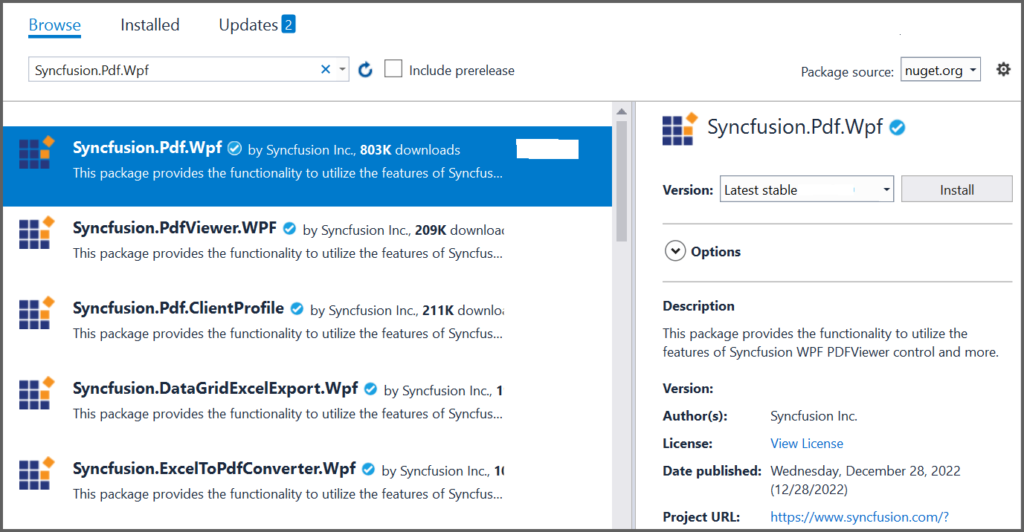
Source: https://help.syncfusion.com/document-processing/pdf/pdf-library/net/WPF_images/NuGet-package.png
- Import the required namespaces into the MainWindow.xaml.cs file.
using Syncfusion.Pdf;
using Syncfusion.Pdf.Graphics;
using System;
using System.ComponentModel;
using System.Drawing;
using System.Windows;
- Add a button in MainWindow.xaml, so you can create a PDF document.
<TextBlock TextAlignment=”Justify” FontFamily=”Verdana” FontSize=”11″ TextWrapping=”Wrap” Padding=”5,5,5,5″ Margin=”0,77,0,1″ >
<TextBlock.Background>
<LinearGradientBrush EndPoint=”0.5,-0.04″ StartPoint=”0.5,1.04″>
<GradientStop Color=”#FFD9E9F7″ Offset=”0″/>
<GradientStop Color=”#FFEFF8FF” Offset=”1″/>
</LinearGradientBrush>
</TextBlock.Background>
<TextBlock.Text>
Click the button to view PDF file generated by Essential PDF.
</TextBlock.Text>
</TextBlock>
<Button Click=”btnCreate_Click” Margin=”0,0,10,12″ VerticalAlignment=”Bottom” Height=”30″ BorderBrush=”LightBlue” HorizontalAlignment=”Right” Width=”180″>
<Button.Background>
<LinearGradientBrush EndPoint=”0.5,-0.04″ StartPoint=”0.5,1.04″>
<GradientStop Color=”#FFD9E9F7″ Offset=”0″/>
<GradientStop Color=”#FFEFF8FF” Offset=”1″/>
</LinearGradientBrush>
</Button.Background>
<StackPanel Orientation=”Horizontal” Height=”23″ Margin=”0,0,0,-2.52″ VerticalAlignment=”Bottom” HorizontalAlignment=”Right” Width=”100″>
<Image Name=”image2″ Margin=”2″ HorizontalAlignment=”Center” VerticalAlignment=”Center” />
<TextBlock Text=”Create PDF” Height=”15.96″ Width=”126″ Margin=”0,4,0,3″ />
</StackPanel>
</Button>
- Add the following code in the btnCreate_Click to generate a PDF document.
- Utilize the PdfDocument class to create the PDF and the PdfGraphics.DrawString method to add text to the PDF page. The output PDF can be saved or downloaded from the application.
//Create a new PDF document.
using (PdfDocument document = new PdfDocument())
{
//Add a page to the document.
PdfPage page = document.Pages.Add();
//Create PDF graphics for a page.
PdfGraphics graphics = page.Graphics;
//Set the standard font.
PdfFont font = new PdfStandardFont(PdfFontFamily.Helvetica, 20);
//Draw the text.
graphics.DrawString(“Hello World!!!”, font, PdfBrushes.Black, new PointF(0, 0));
//Save the document.
document.Save(“Output.pdf”);
}
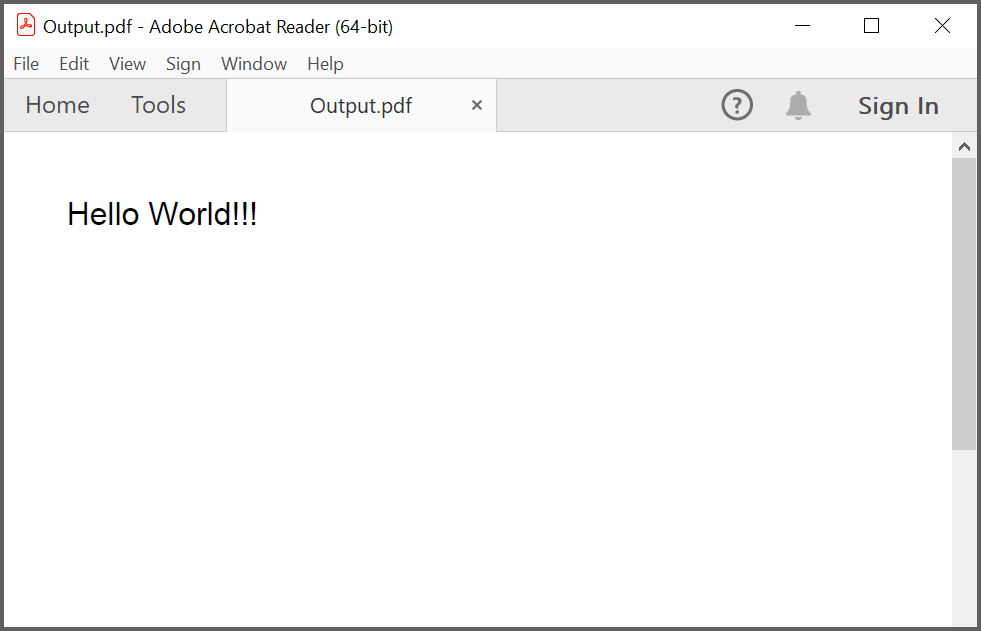
- By running the application, you will generate a PDF document like the one shown below.
Mail Merge From .NET
Mail merging is a powerful technique that helps you to create document templates and populate them with data for batch processing. This allows you to generate multiple personalized documents from a single data source.
Mail merge is mainly done manually in Microsoft Word, but you can automate the process if needed. Doing so allows you to tailor it to your application’s requirements. Since the mail merge APIs are versatile, they can be efficiently utilized in any .NET environment. For a better understanding, let’s give you an example of implementing mail merge in a WPF application.
- First, we create a new document to use as a template. Using the InsertField method, we can define template fields. For instance, to include a placeholder for a recipient’s first name, we insert a MERGEFIELD with a variable name like FirstName. This corresponds to a property in an object that we will pass to the MailMerge method.
private RadFlowDocument CreateDocument()
{
RadFlowDocument document = new RadFlowDocument();
RadFlowDocumentEditor editor = new RadFlowDocumentEditor(document);
editor.InsertText(“Dear “);
editor.InsertField(“MERGEFIELD FirstName”, “”);
editor.InsertText(” “);
editor.InsertField(“MERGEFIELD LastName”, “”);
editor.InsertLine(“,”);
editor.InsertLine(“This is a sample Mail Merge”);
return document;
}
- After setting up the template, you can execute the mail merge with IEnumerable as input. In this example, we will use a predefined list of Person objects, each of which includes properties like LastName and FirstName.
protected void button_Click(object sender, EventArgs e)
{
RadFlowDocument document = this.CreateDocument();
RadFlowDocument mailMergeDocument = document.MailMerge(GetRecipients());
//save the document
}
- Once the merge is complete, you can save the document. This involves creating a MemoryStream and exporting the document using the DocxFormatProvider.
protected void button_Click(object sender, EventArgs e)
{
RadFlowDocument document = this.CreateDocument();
RadFlowDocument mailMergeDocument = document.MailMerge(GetRecipients());
byte[] renderedBytes = null;
using (Stream output = new FileStream(“output.docx”, FileMode.OpenOrCreate))
{
DocxFormatProvider provider = new DocxFormatProvider();
provider.Export(mailMergeDocument, output);
}}
- The final document is ready for printing as physical mail.
Convert Word To PDF In .NET
Telerik DPL makes working with different file types like PDF (export only), DOCX, RTF, and HTML easy. Not only that, but it can also convert files between these formats.
Using the IFormatProvider, you can easily switch between providers in Telerik DPL that use different formats. Here’s a simple example of a console app that imports a DOCX file and converts it to a PDF:
- Use IFormatProvider to create a default format provider and assign it an instance of DocxFormatProvider. A RadFlowDocument will serve as the intermediate document for the conversion process.
IFormatProvider<RadFlowDocument> fileFormatProvider = new DocxFormatProvider();
RadFlowDocument documentToConvert = new RadFlowDocument();
- Open the DOCX document from disk using the DocxFormatProvider and load it into memory as a RadFlowDocument.
using (FileStream input = new FileStream(“input.docx”, FileMode.Open))
{
documentToConvert = fileFormatProvider.Import(input);
}
- Switch the format provider from DocxFormatProvider to PdfFormatProvider. This allows the document in memory to be saved as a PDF.
fileFormatProvider = new PdfFormatProvider();
using (Stream output = new FileStream(“output.pdf”, FileMode.OpenOrCreate))
{
fileFormatProvider.Export(documentToConvert, output);
}
- Write the converted document back to disk as a PDF file.
static void Main(string[] args)
{
IFormatProvider<RadFlowDocument> fileFormatProvider = new DocxFormatProvider();
RadFlowDocument documentToConvert = new RadFlowDocument();
// Read DOCX
using (FileStream input = new FileStream(“input.docx”, FileMode.Open))
{
documentToConvert = fileFormatProvider.Import(input);
}
// Write PDF
fileFormatProvider = new PdfFormatProvider(); // change format provider to PDF
using (Stream output = new FileStream(“output.pdf”, FileMode.OpenOrCreate))
{
fileFormatProvider.Export(documentToConvert, output);
}
}
This entire process requires just a few lines of code. However, there’s one limitation. Telerik DPL doesn’t support importing PDF files because of format restrictions. To avoid errors, you can use the CanImport property of IFormatProvider to check if a format can be imported before using it.
Edit Microsoft Word Documents In WPF And WinForms
Sometimes, clients request complex and time-consuming features, like allowing users to edit Word docs directly within an application. While this may seem challenging, the process is simple if you use Telerik UI for WinForms and Telerik UI for WPF suites.
With these tools, you can easily integrate a rich text editor into your application, enabling smooth editing of Word documents. The editor also supports exporting and importing document content with minimal coding effort.
- Add a rich text editor control to your app to let users edit documents directly within the interface.
- Importing and exporting document content is made easy. Please choose the appropriate format provider for PDF, XAML, DOCX, HTML, TXT, or RTF and use its Export() method to handle content output.
Using Telerik’s rich text components allows you to implement document editing features in your WPF applications. This makes it an efficient and user-friendly solution.
Export A Document To An Accessible PDF
You can save a document as a tagged PDF, which allows users with disabilities to access the content using screen readers and other assistive technologies.
Accessible PDFs can be generated to comply with the following standards:
- PDF/UA
- PDF/A-2a
- PDF/A-1a
- PDF/A-3a
Creating PDF/UA Documents
The PDF/UA standard ensures PDF documents are accessible and compatible with assistive technologies. The standard aligns with the Web Content Accessibility Guidelines (WCAG) 2.0.
Here are some key requirements of the PDF/UA standard for documents:
- All meaningful content must be tagged and included in the document’s structure tree. Non-essential objects like page numbers, decorative images, or repeated information in footers and headers are marked as artefacts.
- Information should not be conveyed by visual elements alone.
- All images and non-text elements like object groups or vector objects must have alternative text.
- The structure tree should represent the document’s logical reading order.
- All fonts must be embedded.
To generate a PDF that meets the PDF/UA standard, create a PdfExportOptions class instance and set the PdfExportOptions.PdfUACompatibility property to PdfUA1. Following that, pass the class instance to the RichEditControl.ExportToPdf method and save the document as a PDF/UA.
Final Words
Now that you know how to convert all downloaded WPF files to PDF, you should find it easy to complete. It may be difficult initially, but following the correct steps will get you through. Converting WPF files to PDF has a hoard of benefits. It makes the format universal and allows users to share or print the File without hassles.
FAQs
How do I turn all files into PDFs?
You can turn all your files into PDFs using Adobe Acrobat, Windows Explorer, or an online converter.
How do you convert Microsoft Works to PDF?
To convert Microsoft Works to PDF:
- Open the Microsoft Works file using Microsoft Works.
- Choose File, and then select Print.
- Select a PDF printer.
- Click Print, then choose a location to save the PDF.
How do I save a WPF control as a PDF?
To save a WPF control as a PDF:
- Use a library like iTextSharp or PDFsharp.
- Convert the WPF control into an image.
- Embed the image into a PDF document.
How to generate a PDF in WPF?
With the help of a library like MigraDoc, PDFsharp, or iTextSharp, you can generate a PDF in WPF.
How do I Convert everything to PDF?
To convert everything to PDF, you can combine Adobe Acrobat into a single PDF.
How do I Convert multiple files to PDF?
To convert multiple files to PDF:
- Use Adobe Acrobat.
- Navigate to File, select Create, and choose Combine Files into a Single PDF.
- Add files and arrange the order.
- Click Combine to generate a single PDF.
How do I put all the files into a PDF?
Adobe Acrobat is a great tool to put all files into a PDF. All you need to do is drag all the files into the software, arrange them in the desired order, and save them as a combined PDF.
How do I convert all documents into one PDF?
If using Adobe Acrobat to convert all documents into one PDF:
- Open Acrobat.
- Select Combine Files.
- Add all documents, reorder if needed, and save as a PDF.
How do I make everything into one PDF?
With the help of a PDF merger tool like Adobe Acrobat, you can make everything into one PDF.
How do I put everything in a PDF?
Use Adobe Acrobat or any other online tool to put everything in a PDF.
